Many times the action performed in response to a contact is some sort of mass mailing or email. When someone has requested information about a ministry, expressed interest in serving in a ministry or is a first time guest requiring a welcome letter. In each of these instances, may receive the same basic response customized using their name and address. There is rarely a need for individualized follow-up.
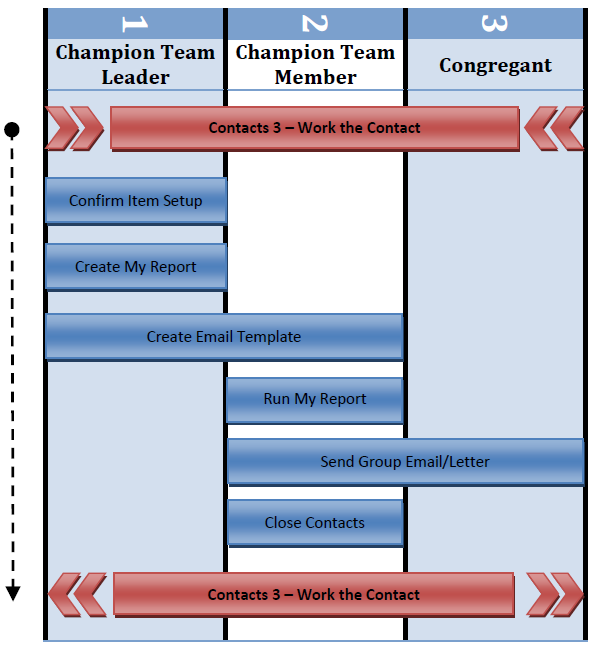
This document describes how to process contacts of the same type for multiple people and close them as a group instead of one by one. Fellowship One can make the management of responding to these types of request a simple effort when working them using this process.
There are a few steps that precede and follow all methods of working contacts in Fellowship One. Review the Work the Contact best practice document for the processes and procedures leading up to the steps described here. After completing those steps, you can enter this process successfully.
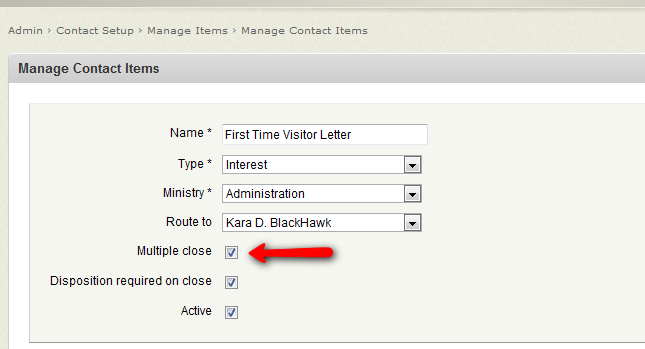
There are a few setup actions that need to be taken for you to be able to utilize the multi-close option in Fellowship One. The first is that the contact item has to be setup with the Multi-Close option turned on.
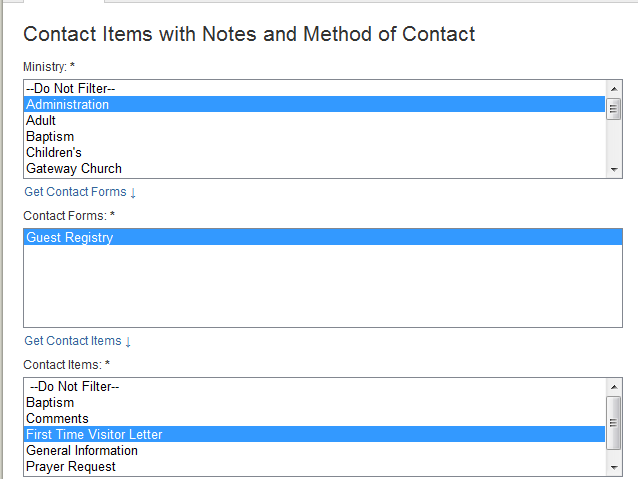
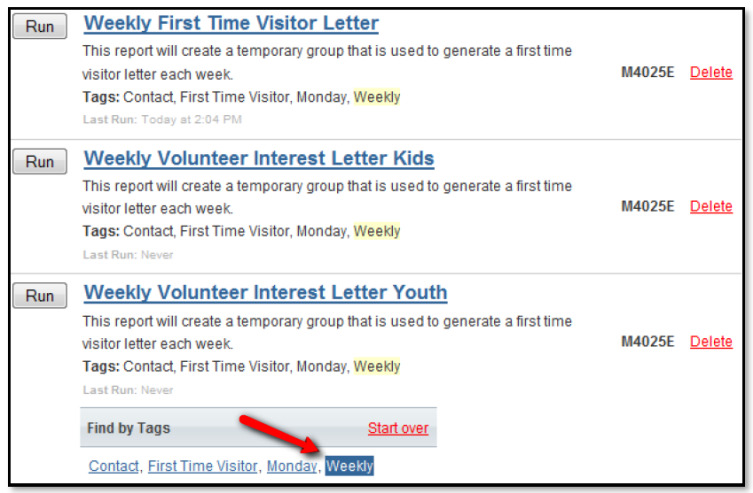
The next step is to configure and save report M4025E so that each week you can create a temporary group containing the people to receive your mass communication with the click of a mouse. This is done in the Report Library. Using the report filters, choose the contact item you want to work. To send guests a “visitor letter”, you may have a contact item called “First Time Visitor Letter” which represents the need for those people having that item to receive a letter. Below we will save the report and call it “Weekly First Time Visitor Letter”.
Setting a named date range is a key component when saving your report.

Don’t forget to set the output type to Temporary Group.

Tagging your reports can also be a big time saver as you add more reports to your library.

Use this technique to create multiple copies of the same report, each with a different contact item chosen to be worked. Each then can easily be run without having to change the report filters every week. They are all set with the same tags and date filters; only the contact item varies.
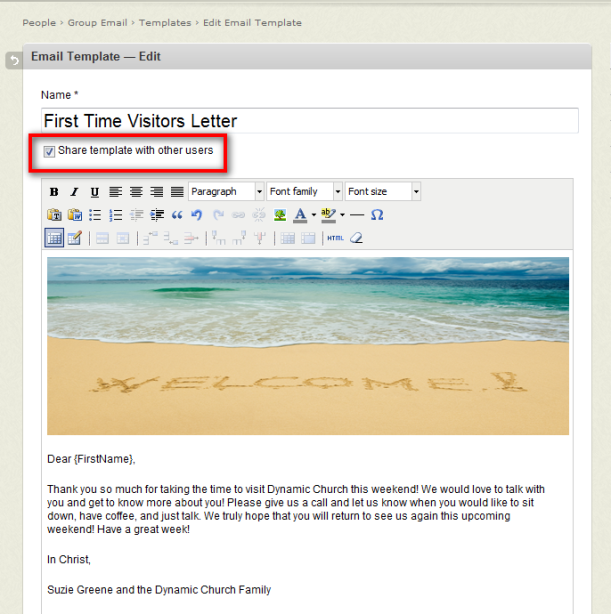
For email communications, it is best to create an email Template that can be used over and over again each week. The content may be identical every time it is used although merge fields can be used to customize the recipient’s name. To allow other church staffers to use your template, don’t forget to check the Share this template with other users box.
If you are planning on sending a letter in the mail you should consider creating a mail merge file using Microsoft Word. We will be discussing how both email and mail merge is used in Fellowship One.
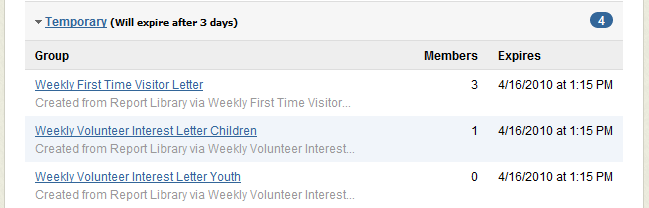
Your saved report(s) based on M4025 should be run weekly to process all contacts of a specific type. A separate Temporary Group will be created for each saved report executed containing the people requiring a specific type of follow up communication. Because we took the time to create multiple versions of the saved report, one for every type of contact follow up, we can quickly and easily create all of the groups of people by clicking the run button beside each report in the My Reports section of the Report Library.
One benefit of using this method is that the created groups will expire and automatically disappear 3 days after you create them. This will keep you from having to remember to delete them after you have finished sending your communication. In the Report Library, the expiration timestamp is noted below:

In the Groups area within the Portal, the created groups appear under the Temporary heading as shown here:
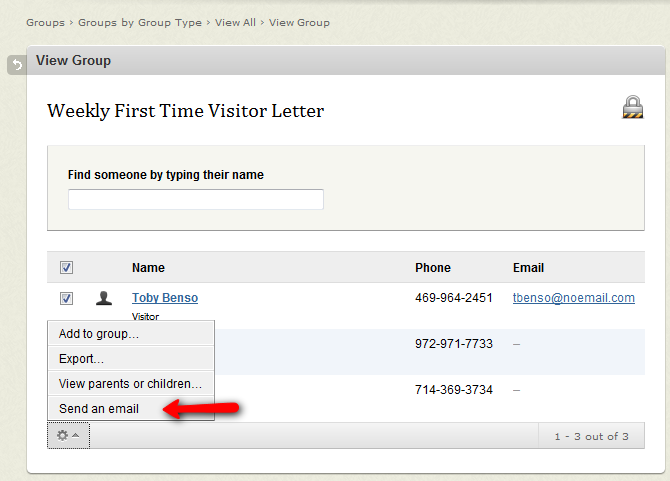
Having your list of your people to contact in a Group allows you to perform a variety of actions to reach out to those folks.
Letter / Postcard / Paper Form
Fellowship One does not have any built in mechanism to generate a letter. However, there is extensive support for exporting name, address and phone information into Excel or CSV files for use by Microsoft Office’s mail merge features. The best approach is to export the contact data using one of the Mail Merge options. The contact type should determine whether you export 1 record person or household. Once exported, you overwrite a data file on your local computer or server set up to specifically work with a mail merge Word document created to generate the desired letter, postcard or paper form. An example would be a first time visitor letter that has been personalized to include the name and address of the contact.
Microsoft provides some free training sites on how to set up a mail merge file. Those can be found at:
http://office.microsoft.com/en-us/help/HA011457271033.aspx
Consider your audience when you send out mass communications. If you get an email address from a first time visitor it is likely they will not be upset by receiving a communication from the church thanking them for their attendance or inviting them to upcoming events. Because of the template emails that were setup in the previous steps, sending this mass communication can be a simple task. Consider addressing the communication to the Household Name. That way if the email is sent to the spouses email address but the contact was created using the head of household’s email address it will still be properly addressing the family.
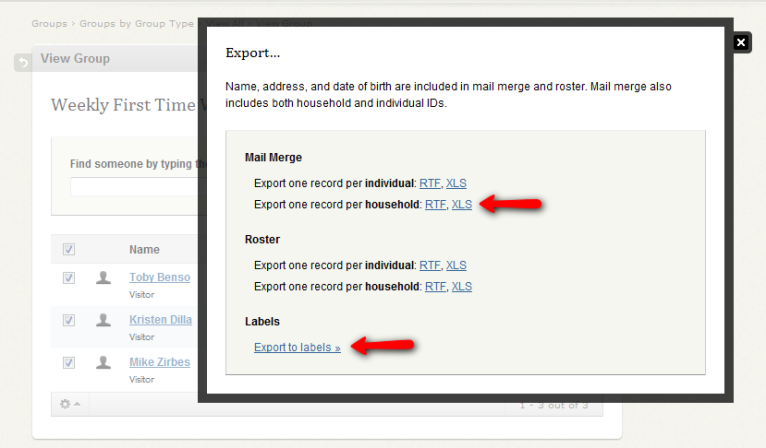
When creating a mail merge document you can either use the same mail merge capabilities in Word to create the letter and the labels or you can use the Fellowship One Label export.
Now that all of the emails/letters have been sent it is time to use Fellowship One’s multi-close capabilities. In the picture below you will notice a few things. First you have to be in the ministry tab and select the ministry where the contacts are located. You can do this by selecting the contacts from your home page. Once there you have to select the item that you want to mass close. If you do not select the particular item the “mass close selected item” will not display in the drop down list.
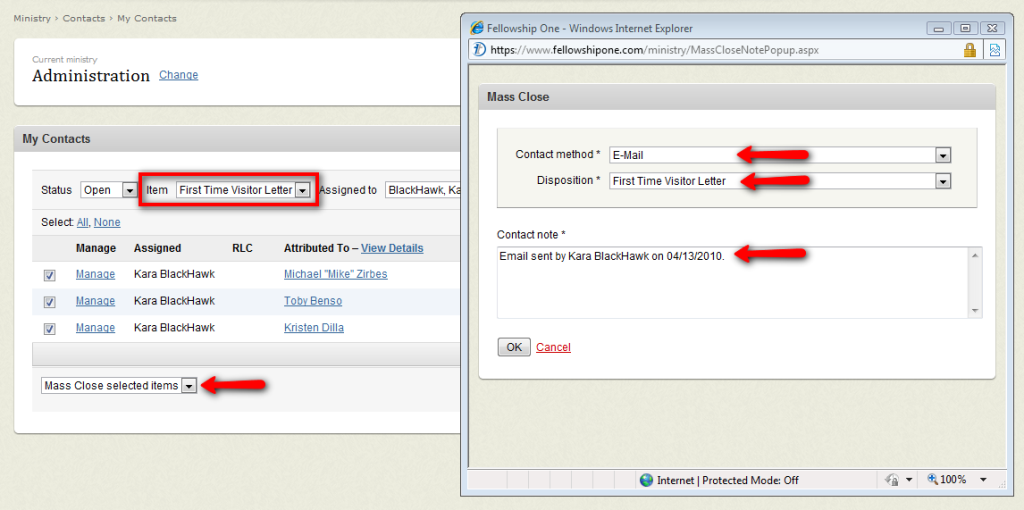
When closing the contacts in mass it is a good idea to put the name of the person and what was sent in the contact note. Some churches choose to cut and paste a copy of the mass communication into the note so that over time they can see how the mass communication has changed.
Once the communications have been sent and the contact items have been closed, return to Work the Contact. There are important processes and reports that need to be reviewed on a weekly and monthly basis to ensure that contacts are appropriately being closed.